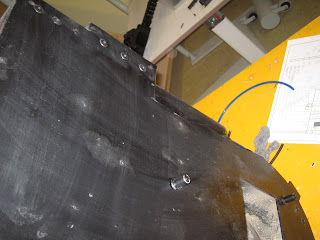
I cut down the lume tubes between the gun and the pack, and screwed them in place with two self drilling screws. The tubes can be removed and reattached with ease, therefore enabling us to repair the tubing, if they are broken..
I then took out the plans, and went on to work on the power cell lens. I had purchased some blue container, which was sanded...
Marked...
Cut..
And after smoothing the edges, I placed some tabs on the packs, to prevent the blue acrylic lenses from dropping inside the packs..
The lens is attached, and holds on, by sheer friction. This is convinient, as the lens needs to be un-attached for the lighting later on.
The PKE meter needed some support. I needed to drill holes for few screws.
To keep the plywood pieces in place. They are cut to match the curvature od the PKE shell insides, but the epoxy does not stick as it should. With these screws on, the plywood is going nowhere..
I filed the screws down a bit, so that they would not cut the wiring.
The lower shell needed some ribs..
And the sides needed holes for the wings. I might need to enlarge them, but I'll know this when the wings are complete..
keskiviikko 19. toukokuuta 2010
maanantai 17. toukokuuta 2010
A lil' more...
Well, I decided that this project WILL be finished by this summer...
Nixu's pack is looking good, but there are some areas that need more detail work..
The throwers need the green tubing, and therefore I got a few pop rivets and inserted them to the places where the pneumatic pieced would be. I did not thigthen the rivet so that it would snap the shaft off, but enough that it stays put.
I then cut out a piece of leftover red tubing to act as medium around the pop rivet shaft and the inside of the green tube.
I soon realized that I needed to bend the rivet a bit to allow the tubing to curve correctly..
That done, I allied some glue, and the tubing, and et presto, here they are.. I did insert the gold painted nuts around the pop rivet shafts before the tubing, mind you..
I then took out the various knobs that are present on the gun. Colin (Irriccanian) provided each resin knob with the corresponding attachment bits, and I then drilled a proper sized hole, and lightly hammered the bits in..
And after a while, all adjustment knobs are in place..
After that, I decided to place the rest of the labels on the gun and pack. Namely the Namebrand rub-on transfers..
They are SUPERB! I bothced up on some of them, but they are still good. I can always hide the mistake by applying some weathering..
I decided to place the 1-2-3 decals so that each gun shows different numbers. Mine is set to one, Veka's on two and Nixu's on three... And no, the knob will not turn. It is epoxied in place..
The packs also received the missing markings... I had a little trouble on deciding which of the red decals were on the gun, and which on the pack, as they both are identical, only that the other is slightly smaller than the other.. After thinking, I decided that the smaller is for the gun, and the larger for the N-Filter..
sunnuntai 16. toukokuuta 2010
A lil' GB work
Another small update..
I buffed the throwers with 0000 grade steel wool. They look really nice now..
I then attached the Clippards on the throwers..
And painted the assorted knobs on the thrower. The knobs themselves came from the only source, Irraccanian..
Then the time was to attach the loom tube on the guns. As I had used self screwing screws to attach the handles, they would work to attach the tube too..
So, I un-screwed the handles..
And reattached them with the tube inside..
The hold is strong enough for the gun be held aloft by the lume tube itself..
And all throwers came to life..
I put out Nixu's pack, and played with it for a while. It loooooks GOOOD!!!!!!!
keskiviikko 12. toukokuuta 2010
Bustin again..
Ok, another small update.
After the top coat on the back of the motherboard had dried, I gave it a little buffing with steel wool. This dulled the shine nicely.. You can see the dust from the buffing, I did not wipe the whole board clean. I then glued the spacers on the motherboard, to help screwing the ALICE frame on..
That said, I attached the frames back on, but there seems to be something missing... Can you guess what?
The large warning label is on the back of the pack. I did some researching, and found that the HD screengrabs provided by Ghostguy on the GBFans.com included the information I needed. It is just behind the top bar of the ALICE frame, where the insulation padding is to be..
So, I promptly glued the labels on. It might seem that the label is higher on this photo, but it is, in reality, in the correct place..
As I lied the packs down, there were another label that was absent... Can you guess?
Here it is, attached in place...
The small, white warning label on the N-Filter wins you the cookies.. There is a red diagram beneath this, I know. I have Namebrand's rub on transfers for this, and Will be adding them soon enough..
tiistai 11. toukokuuta 2010
Ghostbusting again..
Yep, this project moves like a ton of bricks. Slowly, VERY slowly...
The blue tubes were attached to each pack.
It really brings more color and vibrance to the pack.
The Injector Tubes had their tubings too.. As for the loom tubing on these, I could not locate the correct diameter tubing, so I had to take larger one, and cut it to size! I then used black yarn to thinghten the loom tube around the tubing... Very tedious job..
Still, the work was done on each pack..
Looks like business to me..
As for the traps, their bolts are still shining metal.. So, with a bit of plasticine and paint, of to work..
Sorry for the blurry picture. In order to attach the bolts back to their place, I stuck them into plasticine in the order they are on the trap. I then hit them with black paint.
I then went on to work on the Cyclotron lenses. I could not purchase flat sheet of transparent acrylic due to the fact that I was at the shop near closing time.. So, I bought a transparent plastic container for it. I frosted the sides with some sand paper, so that the led lenses would not show through. When lit, the light will still shine through. I then drew the lenses on the sanded surface.
And proceeded to cut them with dremel.
After some filing and sanding, I got few ready to attach lenses..
So, I took out Veka's pack, and un attached the ALICE pack from it.
Without much trouble, the lenses fit in snuggly.. I just love when a plan comes together..
I meant to glue the lenses with epoxy, but I could not spread the glue in due to the fact that the Cyclotron is already attached to the spacer. So, I took out my hotglue gun, and went to work with it. I gather that when the led lights are attached, they can be epoxied on, further strenghtening the join.
But, I need to get these ready for wear, I'll tackle the lighting later on.. As you can see, the lenses look absolutely gorgeous!! The sanding on the other side and the clear side outwards was the ticket!!!
This REALLY looks like a proton pack!!
Yes, I really am pleased with my work on the lenses.
At this time, the paint on the trap bolts were dry enough to screw bark on, so I bolted them back. It really brings the trap a bit more alive.
I then took the packs out again, and painted one final top coat on the back of the packs.
On all three packs. After this, I'll glue the warning label on the top of the backside, and then reattach the ALICE frames, for the final time... I still need to cut the access hatch covers on the packs, but that can wait a bit.. As the access hatch is just behind the kidney strap on the ALICE frame, the packs can be worn even if the openings are not covered. I can attach them later on. And I still need to locate my self drilling screws. I should have some, about 50-100 so I won't buy any more until these are found.
The blue tubes were attached to each pack.
It really brings more color and vibrance to the pack.
The Injector Tubes had their tubings too.. As for the loom tubing on these, I could not locate the correct diameter tubing, so I had to take larger one, and cut it to size! I then used black yarn to thinghten the loom tube around the tubing... Very tedious job..
Still, the work was done on each pack..
Looks like business to me..
As for the traps, their bolts are still shining metal.. So, with a bit of plasticine and paint, of to work..
Sorry for the blurry picture. In order to attach the bolts back to their place, I stuck them into plasticine in the order they are on the trap. I then hit them with black paint.
I then went on to work on the Cyclotron lenses. I could not purchase flat sheet of transparent acrylic due to the fact that I was at the shop near closing time.. So, I bought a transparent plastic container for it. I frosted the sides with some sand paper, so that the led lenses would not show through. When lit, the light will still shine through. I then drew the lenses on the sanded surface.
And proceeded to cut them with dremel.
After some filing and sanding, I got few ready to attach lenses..
So, I took out Veka's pack, and un attached the ALICE pack from it.
Without much trouble, the lenses fit in snuggly.. I just love when a plan comes together..
I meant to glue the lenses with epoxy, but I could not spread the glue in due to the fact that the Cyclotron is already attached to the spacer. So, I took out my hotglue gun, and went to work with it. I gather that when the led lights are attached, they can be epoxied on, further strenghtening the join.
But, I need to get these ready for wear, I'll tackle the lighting later on.. As you can see, the lenses look absolutely gorgeous!! The sanding on the other side and the clear side outwards was the ticket!!!
This REALLY looks like a proton pack!!
Yes, I really am pleased with my work on the lenses.
At this time, the paint on the trap bolts were dry enough to screw bark on, so I bolted them back. It really brings the trap a bit more alive.
I then took the packs out again, and painted one final top coat on the back of the packs.
On all three packs. After this, I'll glue the warning label on the top of the backside, and then reattach the ALICE frames, for the final time... I still need to cut the access hatch covers on the packs, but that can wait a bit.. As the access hatch is just behind the kidney strap on the ALICE frame, the packs can be worn even if the openings are not covered. I can attach them later on. And I still need to locate my self drilling screws. I should have some, about 50-100 so I won't buy any more until these are found.
Tilaa:
Blogitekstit (Atom)